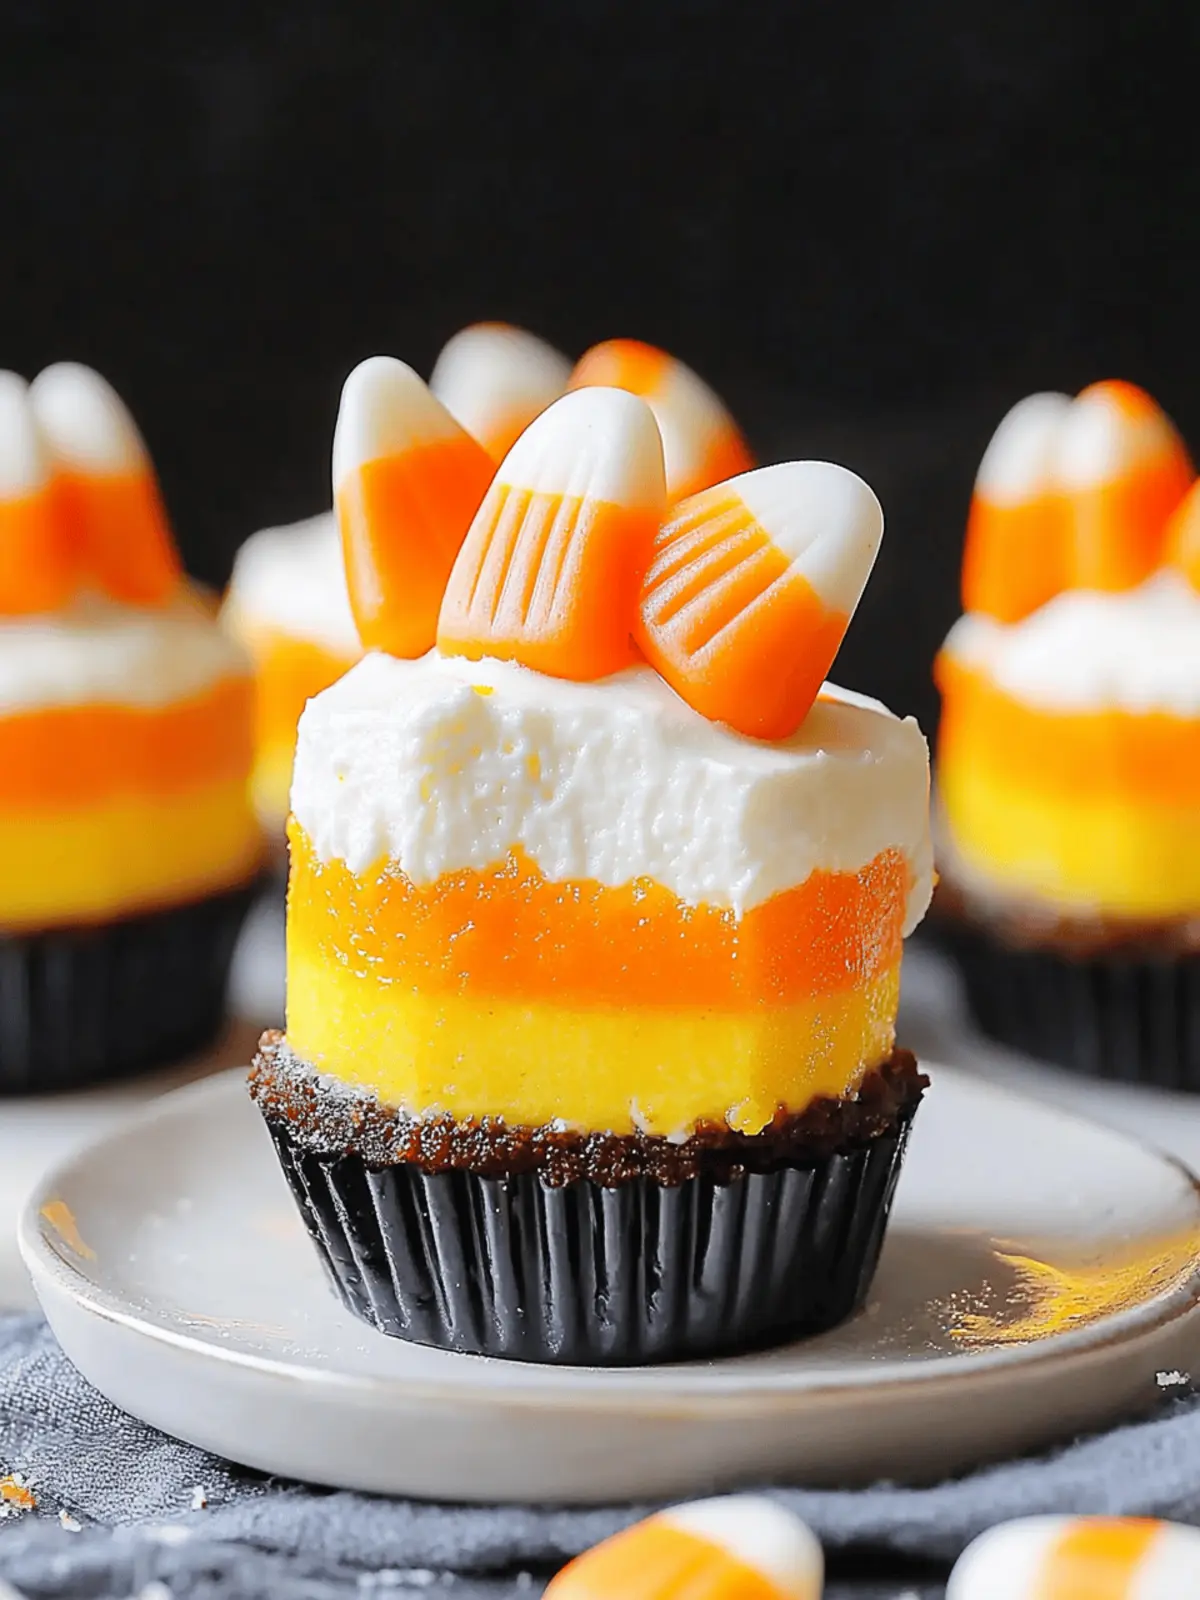
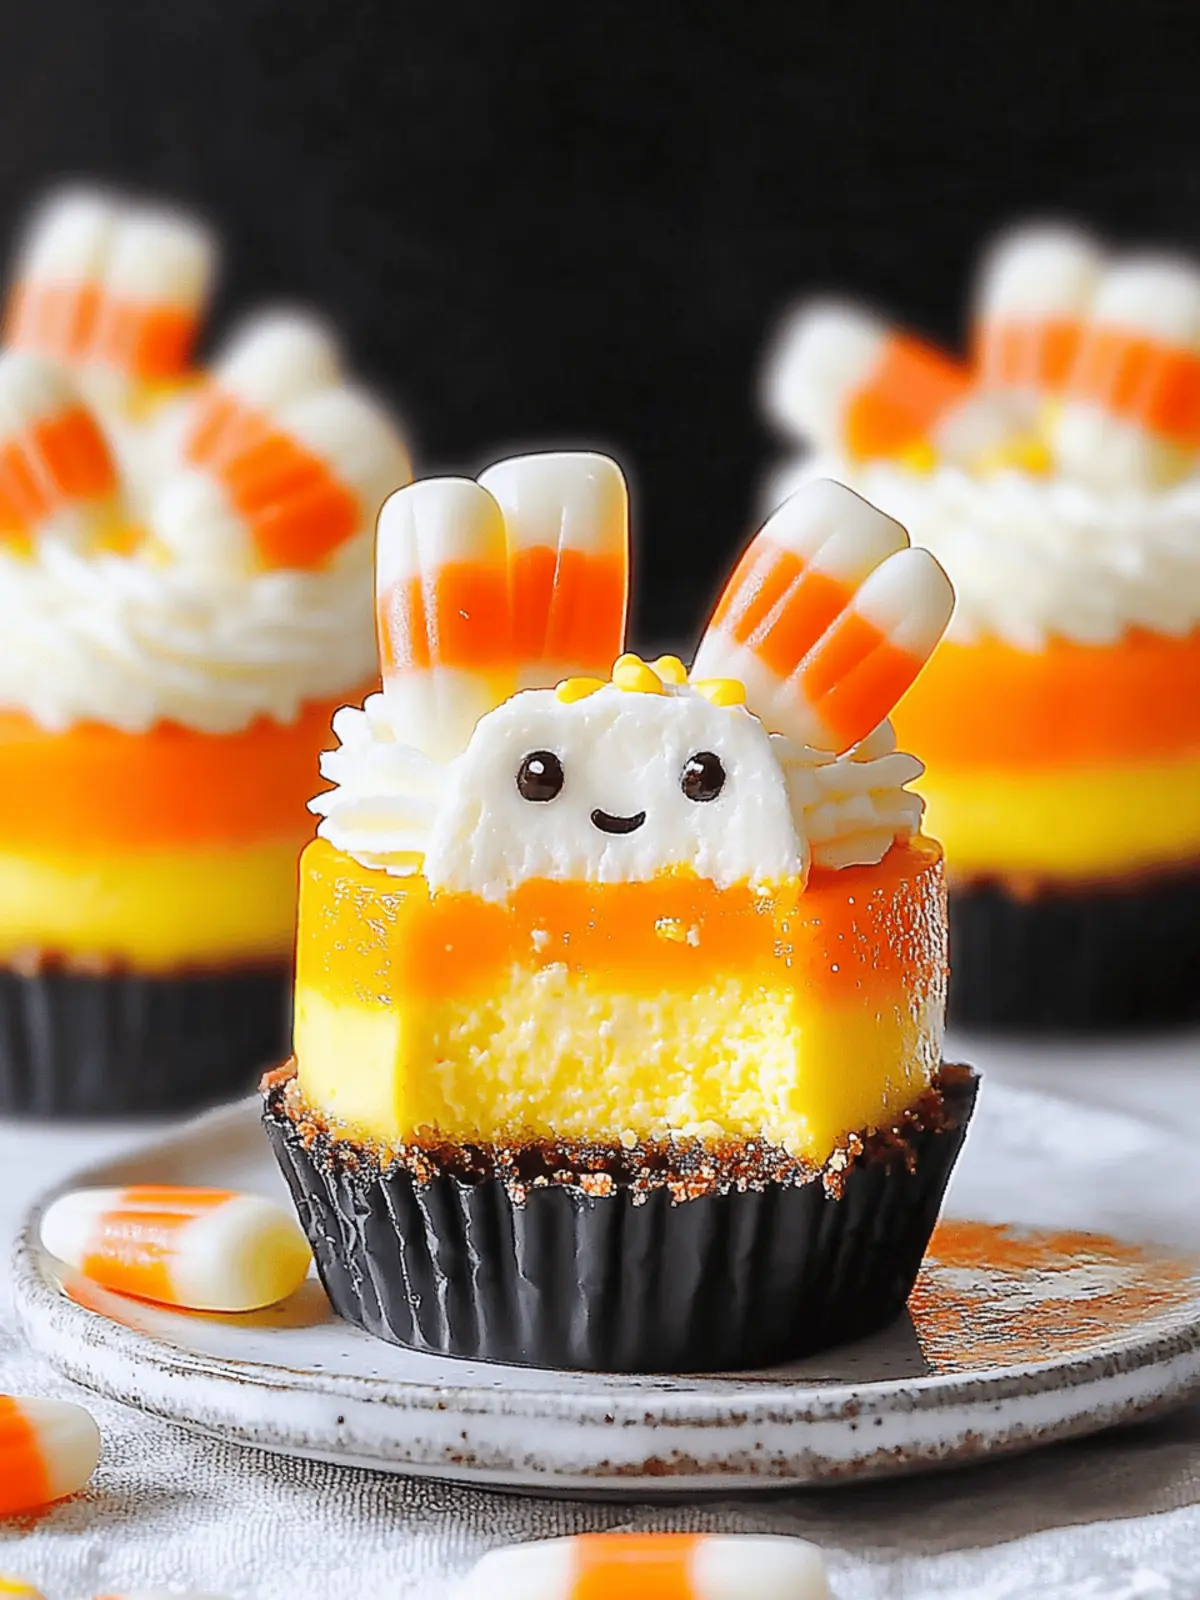
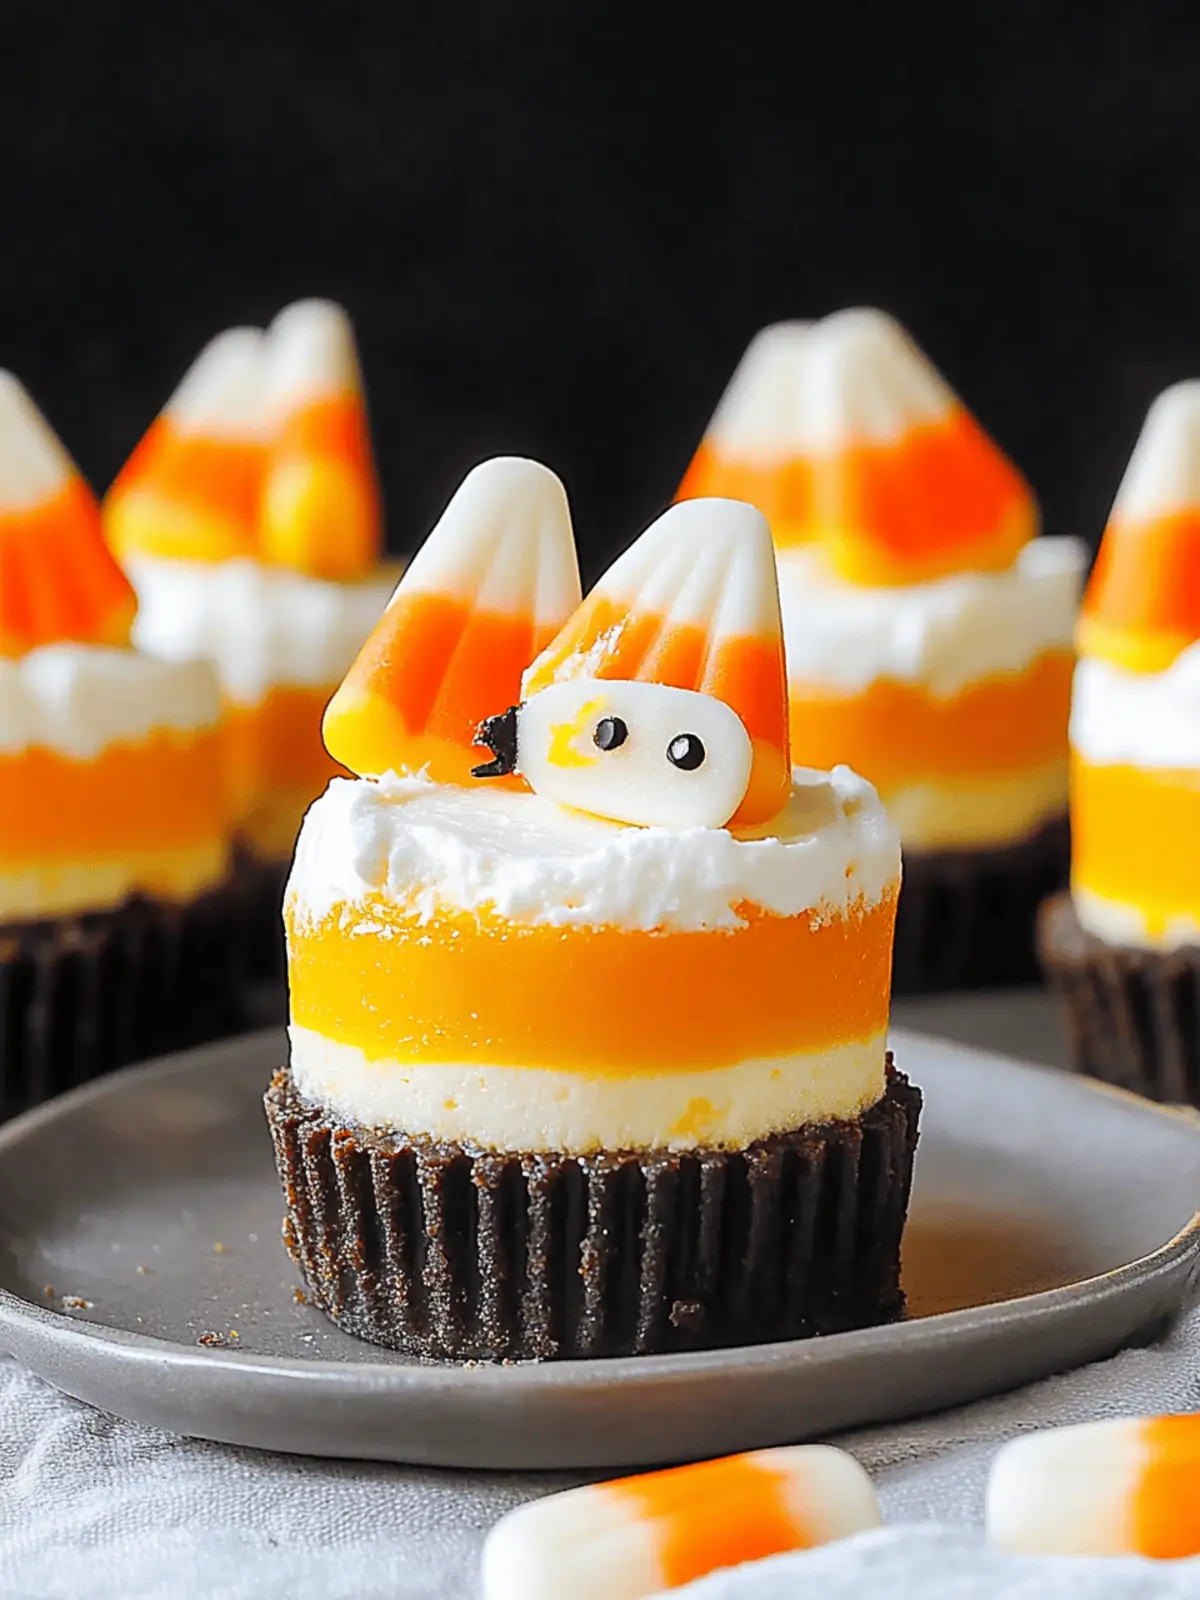
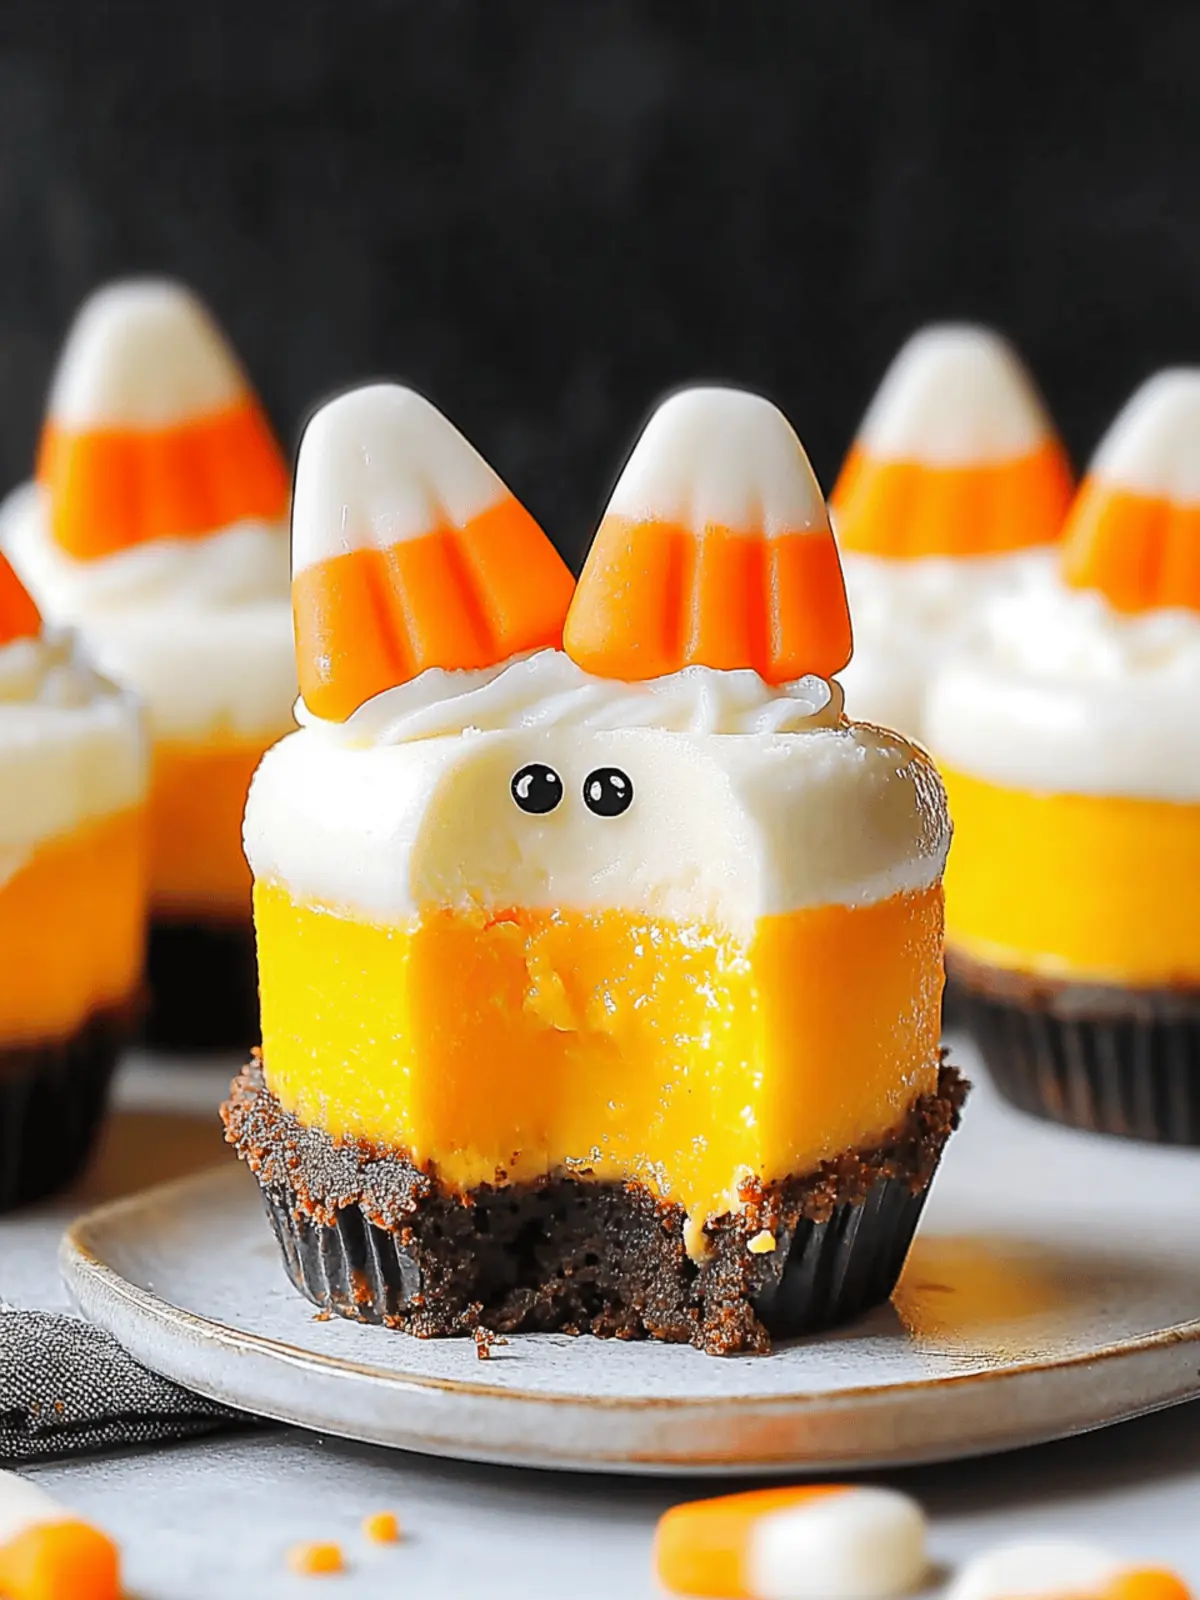
As the crisp autumn air begins to weave its way through my kitchen, I can’t help but feel inspired by the season’s vibrant colors and nostalgic flavors. That’s when these Mini Candy Corn Cheesecakes make their grand entrance! Each bite is a delightful blend of creamy goodness with a touch of whimsy, mirroring the beloved candy we all remember from childhood. The playful combination of colors adds a festive flair, making them the perfect centerpiece for family gatherings or elegant Halloween parties.
But don’t let their charm fool you—these cheesecakes are incredibly simple to whip up, accommodating a variety of dietary preferences whether you’re gluten-free, vegan, or simply craving a chocolate twist. So, if the thought of fast food has you in a culinary rut, let me show you how to bring a little magic back to your kitchen with these delightful mini desserts that are as enjoyable to make as they are to eat!
Why are Mini Candy Corn Cheesecakes a must-try?
Irresistible charm: These adorable treats offer a whimsical take on a classic dessert, making them a fantastic conversation starter at any gathering.
Festive flair: Their vibrant colors mirror the joy of fall, perfectly embodying the spirit of Halloween and Thanksgiving.
Diet-friendly variations: Easily adaptable, you can cater to gluten-free, vegan, or chocolate-loving guests without compromising flavor.
Quick and straightforward: Whipping up these mini cheesecakes is a breeze, ideal for busy weeks or last-minute gatherings.
Crowd-pleasing delight: Each bite combines a creamy filling with a crunchy crust, ensuring everyone leaves with a smile.
Turn your kitchen into a haven of autumn flavors with this delightful recipe that promises both ease and joy!
Mini Candy Corn Cheesecakes Ingredients
For the Crust
- Oreo Crumbs – Provides a sweet, crunchy base; swap with gluten-free cookie crumbs for a gluten-free version.
- Butter – Binds the cookie crumbs together; make sure it’s melted for easy mixing.
For the Filling
- Cream Cheese – Forms the rich base for the cheesecake; use room-temperature cream cheese for a silky texture.
- Sugar – Balances the cream cheese’s tang; feel free to adjust the sweetness to your liking.
- All-Purpose Flour – Thickens the filling; substitute with gluten-free flour for gluten-sensitive diets.
- Sour Cream – Adds a creamy tang; opt for full-fat for the best taste.
- Vanilla Extract – Infuses warmth and sweetness; using high-quality extract greatly enhances flavor.
- Eggs – Essential for binding the filling; ensure they are at room temperature for better incorporation.
- Yellow Gel Icing Color – Creates a vibrant yellow layer; can be omitted for a simpler look.
- Orange Gel Icing Color – Adds a fun pop of color; try different colors for other festive occasions.
For the Whipped Cream Topping
- Heavy Whipping Cream – Necessary for fluffy whipped cream; chill it before whipping for optimal texture.
- Powdered Sugar – Sweetens the whipped cream without grittiness; helps achieve a smooth finish.
For Decoration
- Ghost Toppers – Cute decorations that enhance the festive appeal of these cheesecakes.
Feel the joy of creating these Mini Candy Corn Cheesecakes as you gather around the table with loved ones, making sweet memories this fall!
How to Make Mini Candy Corn Cheesecakes
-
Preheat your oven to 325°F (162°C). Line a cupcake pan with liners and spray them lightly with non-stick spray for easy removal later.
-
Combine the Oreo crumbs with melted butter in a mixing bowl. Press the mixture firmly into the liners to create a sturdy crust. Bake for 5 minutes, then remove and let cool.
-
Lower the oven temperature to 300°F (148°C) for baking the cheesecakes properly.
-
Beat the cream cheese, sugar, and flour together in a large bowl until smooth and creamy. Add the sour cream and vanilla extract, mixing until well combined.
-
Incorporate the eggs one at a time into the mixture, ensuring each is fully blended before adding the next for a uniform filling.
-
Divide the batter into three bowls. Color one bowl with yellow gel icing, the second with orange gel icing, and leave the last one plain to maintain the classic cheesecake look.
-
Layer the colored batters into the prepared crusts. Start with the yellow batter, followed by the orange, and then finish with the plain batter for a delightful tiered effect.
-
Bake for approximately 15 minutes. After the time is up, turn off the oven and let the cheesecakes rest inside for another 10 minutes, creating a pleasant steam effect.
-
Cool the cheesecakes gradually by cracking the oven door and letting them sit for 15-20 minutes before transferring them to the fridge to chill completely.
-
Whip the heavy cream, powdered sugar, and vanilla together until you reach stiff peaks. Pipe this fluffy whipped cream atop your chilled cheesecakes, adding cute ghost toppers for a festive touch!
-
Refrigerate until ready to serve, and enjoy your delightful treats within 2-3 days for the best freshness!
Optional: Sprinkle crushed nuts on top for an added crunch!
Exact quantities are listed in the recipe card below.
Expert Tips for Mini Candy Corn Cheesecakes
- Room Temperature Ingredients: Ensure your cream cheese and eggs are at room temperature for a silky filling; cold ingredients can result in lumps.
- Layer Colors Carefully: Pour each colored batter gently to avoid mixing and achieving distinct layers. Take your time for a pretty presentation!
- Avoid Overbaking: Test the cheesecakes around the 15-minute mark. Overbaking can lead to cracks, compromising the beautiful look of your Mini Candy Corn Cheesecakes.
- Chill Properly: Allow the cheesecakes to cool gradually by cracking the oven door open to prevent sudden temperature changes that may cause cracking.
- Whipped Cream Perfection: Start with cold heavy cream for the best whipped cream topping. Whip until stiff peaks form for a beautiful finish.
Mini Candy Corn Cheesecake Variations
Customize these delightful cheesecakes to suit your taste or dietary needs while keeping the fun spirit of fall alive!
- Gluten-Free: Use gluten-free cookie crumbs in place of Oreos for a delicious gluten-free cheesecake base.
- Vegan: Swap cream cheese for a dairy-free alternative and use coconut cream for an equally creamy filling.
- Chocolate Lovers: Incorporate cocoa powder into the crust, transforming these treats into rich, chocolate-flavored delights.
- Nutty Crunch: Add chopped nuts, like pecans or almonds, to the crust for a delightful crunch that contrasts beautifully with the creamy filling.
- Spiced Up: Sprinkle in some cinnamon or pumpkin spice for a warm, seasonal twist that perfectly encapsulates fall flavors.
- Swirled Delight: Incorporate melted chocolate or fruit preserves into the filling to create visually stunning, marbled cheesecakes that excite the palate.
- Cheesecake Bites: Make mini versions using a mini muffin tin for bite-sized treats that are perfect for parties or gatherings.
Feel free to mix and match these variations to create a unique experience with every batch!
What to Serve with Mini Candy Corn Cheesecakes?
As you savor the creamy goodness of these delightful treats, elevate your autumn gatherings with perfect pairings that harmonize and highlight their whimsical charm.
-
Pumpkin Spice Lattes: The warm and spicy notes beautifully complement the sweet cheesecake, enhancing that cozy fall atmosphere.
-
Apple Cider: A refreshing glass of apple cider, whether hot or cold, adds a fruity touch that balances the richness of the dessert.
-
Vanilla Ice Cream: The creamy, cold contrast of vanilla ice cream provides a delightful texture that pairs wonderfully with the cheesecakes.
-
Chocolate Drizzle: A rich chocolate sauce drizzled on top introduces a decadent layer that satisfies chocolate lovers, adding a touch of indulgence.
A delightful serving idea is pairing these cheesecakes with spiced nuts. The crunchy nuts bring a delicious crunch, satisfying the palate’s desire for both creamy and crunchy textures.
-
Autumn Fruit Salad: A blend of seasonal fruits like pears, apples, and pomegranates creates a refreshing side that lightens up the meal.
-
Caramel Sauce: A drizzle of warm caramel on each cheesecake is not just delicious but also adds an appealing golden touch for presentation.
Each of these pairings adds a new dimension to your Mini Candy Corn Cheesecakes, ensuring a memorable experience filled with seasonal delight!
How to Store and Freeze Mini Candy Corn Cheesecakes
Fridge: Store your Mini Candy Corn Cheesecakes in an airtight container for up to 2-3 days. This keeps their creamy texture intact and flavorful.
Freezer: For longer storage, freeze these cheesecakes for up to 2 months. Wrap each cheesecake tightly in plastic wrap, then place them in a freezer-safe container.
Thawing: When ready to enjoy, thaw the cheesecakes in the fridge overnight. Avoid thawing at room temperature to retain their texture.
Reheating: If desired, you can gently reheat them in the microwave for about 10-15 seconds to restore creaminess before serving, but they’re best served chilled.
Make Ahead Options
These Mini Candy Corn Cheesecakes are ideal for meal prep, allowing you to savor your time while bringing festive flavors to your table! You can prepare the crust up to 24 hours in advance by mixing the Oreo crumbs with melted butter, pressing it into the liners, and storing it in the fridge. The filling can be made up to 3 days ahead; simply mix and layer it in the crust before baking. To maintain the cheesecakes’ creamy texture, refrigerate them covered and let them cool gradually after baking. When you’re ready to serve, finish by whipping the cream and topping each cheesecake, ensuring they remain just as delicious as if made fresh that day!
Mini Candy Corn Cheesecakes Recipe FAQs
How can I choose the right ripeness for my ingredients?
Absolutely! When selecting cream cheese, look for a brand that’s fresh and hasn’t been previously frozen, as this can affect the texture. For the eggs, choose ones that are large and at room temperature to ensure they incorporate smoothly into the filling. Using sour cream that’s full-fat will also enhance the creaminess of your Mini Candy Corn Cheesecakes.
What’s the best way to store Mini Candy Corn Cheesecakes?
For short-term storage, keep your cheesecakes in an airtight container in the refrigerator, where they can stay fresh for about 2-3 days. If you’re looking to save them for a longer period, pop them into the freezer, where they will last for up to 2 months. Just make sure they’re wrapped tightly in plastic wrap or stored in a freezer-safe container.
How do I freeze Mini Candy Corn Cheesecakes?
To freeze these delightful treats, first, let them cool completely in the fridge. Next, wrap each cheesecake individually in plastic wrap to prevent freezer burn. Place them in a freezer-safe airtight container. When you’re ready to enjoy, simply transfer the cheesecakes to the refrigerator to thaw overnight. Remember, avoid thawing them at room temperature to help maintain their fabulous texture!
What should I do if my cheesecakes crack after baking?
Very common! If your Mini Candy Corn Cheesecakes develop cracks, it may have been due to rapid temperature changes while cooling. To prevent this, try cracking the oven door open slightly for about 15-20 minutes after baking. This gradual cooling method can help avoid that shocking temperature shift. Also, avoid overbaking; if they jiggle slightly in the center when you take them out, they’re likely perfect!
Can my pets enjoy these Mini Candy Corn Cheesecakes?
Though tempting, it’s best to keep these cheesecakes away from pets, especially because the cream cheese and sugar may not sit well with them. Plus, ingredients like chocolate can be toxic to dogs. Always ensure your furry friends stick to their treats while you enjoy these delicious Mini Candy Corn Cheesecakes!
Mini Candy Corn Cheesecakes: Fall Treats with a Twist
Ingredients
Equipment
Method
- Preheat your oven to 325°F (162°C). Line a cupcake pan with liners and spray them lightly with non-stick spray.
- Combine the Oreo crumbs with melted butter in a mixing bowl. Press firmly into the liners to create a sturdy crust. Bake for 5 minutes, then remove and let cool.
- Lower the oven temperature to 300°F (148°C).
- Beat cream cheese, sugar, and flour together in a large bowl until smooth. Add sour cream and vanilla, mixing well.
- Incorporate eggs one at a time, ensuring each is fully blended before adding the next.
- Divide the batter into three bowls. Color one bowl with yellow gel icing, the second with orange gel icing, and leave the last one plain.
- Layer the colored batters into the crusts: start with yellow, then orange, followed by plain.
- Bake for approximately 15 minutes. After baking, turn off the oven and let the cheesecakes rest inside for 10 minutes.
- Cool the cheesecakes gradually by cracking the oven door and letting them sit for 15-20 minutes before transferring to the fridge.
- Whip the heavy cream, powdered sugar, and vanilla until stiff peaks form. Pipe this atop your chilled cheesecakes, adding ghost toppers.
- Refrigerate until ready to serve. Enjoy within 2-3 days for best freshness!

